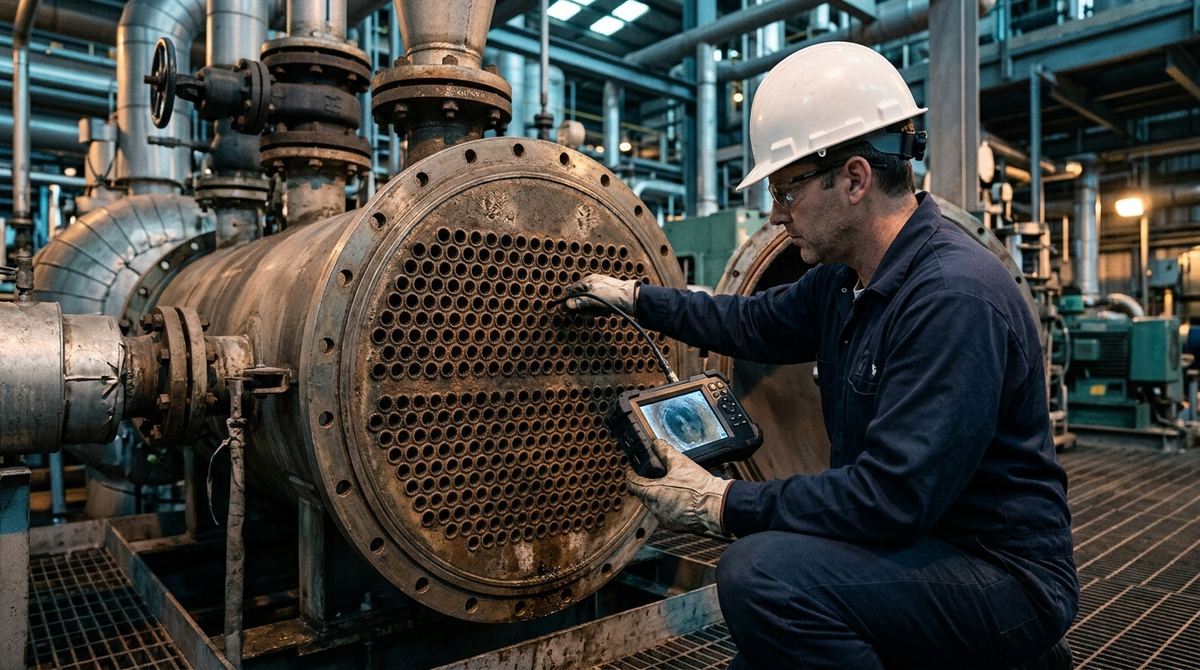
Every planned shutdown reaches the moment when someone stands in front of an exchanger with the channel head open and has to call it: the bundle comes out, or it stays. A turnaround schedule has no slack for suspicion. Pulling a bundle means cranes, flanges, new gaskets, final testing, whole days of a contested window, while leaving it in place means signing off on its fitness until the next shutdown. For years that call was made from history files, heat-transfer losses and the judgment of whoever knows the plant best. The videoscope changed it at the root, because it enters the tubes with only the heads open and brings back the one piece of information that can move the verdict: what is actually in there.
Inside the tubes, damage wears different faces
Engineers who inspect cooling-water-side exchangers learn to recognize a progression. The first alarm is usually thermal and arrives before any camera does, when the exchanger starts to underperform. API RP 571, the American Petroleum Institute's compendium of more than sixty damage mechanisms for fixed equipment, each with susceptible materials, critical factors and recommended inspection methods, points to fouling as the first suspect. Inside the tube, though, a deposit that cuts heat transfer is rarely just a performance problem. Local chemistry changes underneath it, and under-deposit corrosion works under cover. The surface the water jet cleaned may look sound while the metal beneath the remaining deposits keeps losing thickness.
The most treacherous case is microbiologically influenced corrosion, MIC. Bacterial colonies build tubercles that pass for ordinary scale. Underneath, in carbon steels, the classic morphology is a pit within a pit; in stainless grades, sub-surface cavities grow with an opening small out of all proportion to the missing metal. An operator who simply counts visible pits underestimates the damage almost by construction. Reading the images therefore takes the same competence as acquiring them, because the videoscope documents morphology, but it is knowledge of the mechanisms that turns that morphology into a diagnosis. One prerequisite no datasheet can work around: a dirty tube shows the deposit, not the metal. The inspection is planned after hydroblasting, and the quality of the cleaning sets the quality of the diagnosis.
The exchanger picks the probe
Before any comparison between models, probe selection is an exercise in geometry. Tube bundles built to TEMA practice use a series of standard inch outside diameters, and among the most common are 19.05 mm (3/4 in) and 25.4 mm (1 in). Subtract the wall thickness, which for the usual BWG gauges runs from about 1.2 to 2.8 mm, and the usable bore ranges roughly from 13.5 to 23 mm, as the BWG gauge tables show. Through that bore must pass the probe, its illumination and enough clearance to keep the optics off the deposits. That is why 4 mm and 6 mm probes have become the de facto standard for bundle work, with 8 mm versions where the bore allows and more light is needed.
Working length weighs as much as diameter, and gets underestimated more often. Bundle tubes are often several meters long, and a probe inspecting from one end has to cover the full length. The available working length should therefore be checked against the real tube length, taken from the equipment drawings, before optics are even discussed. Inside a straight tube, tip articulation matters less than it does in a turbine, but optical centering and measurement remain decisive. Stereo and shadow techniques size a pit directly from the image and set it against an acceptance criterion, instead of filing away a photograph and an opinion. How these requirements translate into purchasing specifications is covered in detail in the videoscope selection guide.
From the tubesheet to the final report
An inspection meant to produce a decision is built before the instrument is switched on. Access comes first: which heads will be open, in what sequence relative to cleaning, how much of the turnaround window each item of equipment gets. Coverage on the tubesheet comes next. Inspecting every one of several hundred tubes isn't always compatible with the schedule. Selection then follows the logic of the damage, favoring inlet zones where erosion works, peripheral tubes and stagnation zones where deposits build, plus tubes already plugged in previous shutdowns, which carry the history of the equipment. Every inspected tube gets identified on the tubesheet map with its finding, because the value of the report lives in the comparison with the next shutdown.
On procedure and documentation, the reference is ASME Section V, Article 9, which governs direct and remote visual examination, from personnel requirements and lighting to the written procedure and the recording of results. Acceptance criteria beyond the Code requirements are a matter of agreement between the contracting parties, and they are best fixed before the inspection, because in front of the images they turn into a negotiation. In Europe the general principles of direct and remote visual testing are collected in EN 13018:2016, and VT personnel qualification follows ISO 9712:2021 when the specification requires it.
Placing the inspection in time takes the right code. The tube bundle is part of a pressure vessel, so it falls under API 510 (11th edition, 2022), with the inspection practices of API RP 572 (5th edition, 2023). API 570 (5th edition, 2024) covers process piping instead. In both codes the thickness measurement interval may not exceed half the calculated remaining life, on top of the maximum set for the equipment type or piping class. That remaining-life cap is the intelligent half of the rule, because it shortens intervals precisely where corrosion runs. Skip the planning and the time saved comes back as unreferenced images that nobody, six months later, can place on a specific tube.
On process piping, the method changes little, but access changes a lot. Entry comes through an opened flange, a removed valve, a nozzle, and the choice of points follows the damage mechanisms once again. API RP 571 concentrates localized corrosion at injection points, in dead legs where the fluid stagnates, and downstream of changes in direction, which is exactly where the optics should go. The videoscope earns its keep where external thickness readings are blind or impractical. That covers weld root verification on new lines before commissioning, the search for deposits and blockages, and visual confirmation of an indication the thickness gauges flagged at a condition monitoring location. The time-comparison logic applies here too: one image tied to a precise point on the line, repeated at every shutdown, is worth more than a hundred unreferenced ones.
What the camera will never measure
A serious supplier says it before you find out: the videoscope sees the surface, and thickness can't be read from the surface. Stereo measurement sizes a pit that breaks the surface, but it can't say how much wall remains underneath, can't see thinning from the shell side, can't quantify distributed metal loss. Those numbers belong to other methods: ultrasonic thickness measurement, the IRIS technique for full wall mapping of a tube, eddy current methods for fast screening of non-ferromagnetic materials. In a mature workflow the methods follow one another. First comes the videoscope, as the diagnostic screening that ranks the tubes and identifies the damage mechanisms, then the quantitative techniques, concentrated on the tubes the screening flagged. Asking the camera for a thickness value is a framing error, while using it to decide where to measure is its actual job.
Want to see it on one of your exchangers?
Tell us the equipment, tube diameters and lengths, and we'll arrange a field demonstration with probes in the right diameters, measurements on real defects and a report format agreed with your inspector.
Email us Message us on WhatsAppA turnaround is counted in days
The economics of videoscope inspection need no invented figures, because the reasoning stands on its own. Opening heads is a matter of hours; pulling a bundle is a matter of days, and the days of a planned shutdown are the most contested resource a plant owns. Every bundle pulled "to be safe" and found healthy is a window of crane time and specialist labor spent confirming a doubt. Every bundle left in service unseen is a bet that comes due at the next shutdown. Videoscope screening trims both tails: bundles get ranked by real condition, extractions and retubing concentrate where the damage is, and materials get ordered early, while tube lead times still fit the calendar. The return on the operation grows with the quality of the diagnosis, which is why instrument, cleaning and reading competence should be treated as one package. The same approach, carried over to gas turbines and engines, is described in the guide to borescope inspection of turbines.
See it work on your own plant
The honest trial of a videoscope, or industrial endoscope as many maintenance teams call it, happens on a real exchanger, with its tubes, its deposits and its history. DIPITECH, within its range of industrial borescopes and endoscopes, distributes industrial videoscopes with interchangeable probes in the diameters and lengths tube bundles demand, and structures the evaluation as a field demonstration. A representative item of equipment is chosen and probe coverage is verified against actual tube diameters and lengths. Then images and measurements are taken on real defects, and the report format the inspector and the end customer will have to accept is built together. How to compare offers on three-year cost and support is explained in the article on buying criteria for an industrial videoscope.
What to send us for an assessment
To prepare a useful demonstration we need a few data points on the equipment:
- exchanger type (removable bundle, fixed tubesheet, U-tube) and tube-side and shell-side fluids;
- tube outside diameter, wall thickness or BWG gauge and length, number of tubes;
- suspected damage mechanisms and shutdown history (plugged tubes, leaks, fouling);
- cleaning method and timing before inspection, and length of the outage window;
- for piping: diameters, available access points (flanges, valves, nozzles) and lengths to cover;
- governing code or procedure and required report format.
You can send them by email to info@dipitech.com or on WhatsApp, attaching datasheets or drawings of the equipment.
Frequently asked questions on videoscope inspection of heat exchangers and piping
What can a videoscope actually show inside heat exchanger tubes?
After proper cleaning of the bundle, a videoscope shows the real condition of the internal surface: residual deposits and fouling, pitting, under-deposit corrosion, the tubercles typical of microbiologically influenced corrosion (MIC), erosion at inlet zones, visible cracks and mechanical damage. These are the damage mechanisms API RP 571 catalogs for cooling-water-side exchangers. The detail that decides the reading is comparing neighboring tubes filmed under the same light: a difference in color or finish between tubes in the same zone often says more than a single isolated pit.
Which probe do you need to inspect a tube bundle?
The bundle geometry dictates it. With 3/4 in and 1 in tubes, among the most common, the usable bore ranges roughly from 13.5 to 23 mm depending on the gauge. 4 mm and 6 mm probes are the practical compromise between access, light and image quality. On length there is a margin people forget: if both heads are opened and each tube is inspected from both ends, the working length needed is halved, at the price of a second access.
Does a videoscope measure remaining tube wall thickness?
No. A videoscope sees the internal surface and, with stereo or shadow measurement, sizes what breaks that surface: the diameter and local depth of a pit, the extent of a damaged area. It does not quantify remaining wall thickness or metal loss from the shell side of the tube: that requires ultrasonic testing, the IRIS technique or eddy current methods. The sound workflow uses the videoscope as a diagnostic screening tool to decide where to measure and with which technique.
Which codes and standards apply to remote visual inspection?
For the method, ASME Section V, Article 9 applies, and in Europe EN 13018:2016; for intervals, API 510 covers exchangers and vessels and API 570 covers piping. A useful detail at ordering time is that acceptance criteria beyond the Code requirements are agreed between the parties, so the specification has to say what gets a tube plugged or replaced before the inspection starts.
When does videoscope inspection beat a full opening?
When the decision is between pulling the bundle or leaving it and the heads can be opened, which is almost always the case in a planned shutdown. Inspection from the inside falls short with shell-side damage or distributed wall loss: there the camera points to the suspect tubes, but confirmation comes from measurement techniques or from extraction.